Author name: Admin

Refrigerator Not Cooling What You Should Know
Uncategorized

Refrigerator Not Cooling: What You Should Know

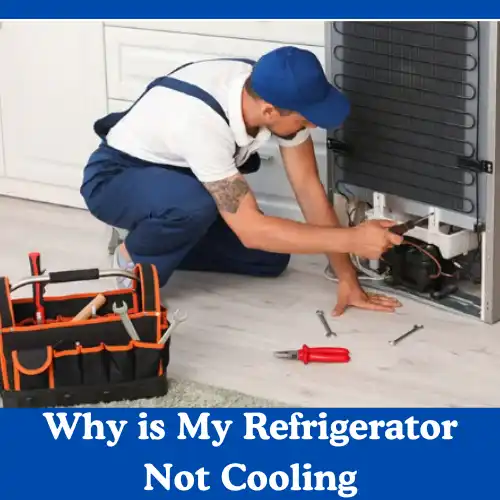
Why is My Refrigerator Not Cooling? When a refrigerator stops cooling, food can spoil fast and your energy bills can go up. If the problem isn’t fixed in time, it may even damage the appliance for good. The FDA recommends keeping your refrigerator at 40°F or below and your freezer at 0°F to keep food safe. Some problems are simple, like a wrong setting or dirt buildup. Others involve electrical parts and need attention from a refrigerator repair technician. Knowing the difference can help you avoid bigger issues and costly repairs. If your refrigerator isn’t cooling and you’re not sure why, this guide will help you find the problem step by step. Keep reading to learn the easy checks that could save you time, food, and money. Why Is My Refrigerator Not Cooling? There are many reasons a refrigerator may not stay cold. If your fridge is running but not holding the right temperature, one or more of these issues could be the cause. 1. Tripped Circuit Breaker Sometimes the fix is very simple. If the breaker that powers your refrigerator trips, the unit won’t cool at all. Check your breaker panel, find the switch for the refrigerator, and turn it back on if needed. 2. Temperature Setting Is Too Low It sounds obvious, but it’s often missed. Check the temperature control and make sure it’s set correctly. Your owner’s manual will show the right settings for your model. 3. Door Not Closing Properly If the door doesn’t seal tightly, warm air gets inside. Check that the doors close fully and that the light turns off when shut. The rubber seal around the door, called a gasket, can tear over time. A damaged gasket should be replaced to keep cold air inside. 4. Blocked Airflow Cold air needs space to move. If food boxes are pushed against the back wall or blocking vents, the fridge won’t cool evenly. Rearranging items can fix this problem quickly. 5. Dirty Condenser Coils Cold air needs space to move. If food boxes are pushed against the back wall or blocking vents, the fridge won’t cool evenly. Rearranging items can fix this problem quickly. 6. Refrigerant Leak Refrigerant helps your fridge stay cold. If it leaks, cooling power drops. Because refrigerants can be dangerous, this problem should always be handled by a trained professional. How to Reset a Refrigerators That is Not Cooling 1. Make Sure the Refrigerator Is Plugged In It may sound simple, but this is one of the most common things people miss. If you’ve just returned home from a trip or haven’t checked the fridge in a while, it’s possible the plug came loose. Start by looking at the wall outlet and make sure the refrigerator is plugged in all the way. Check the power cord too. If it looks worn or damaged, it may need to be repaired or replaced. Next, check your home’s breaker box. A tripped breaker can stop power to the fridge and cause it to stop cooling.  2. Check Where the Refrigerator Is Placed Where your refrigerator sits in the kitchen matters more than you might think. If it’s placed near a stove, oven, heating vent, or a sunny window, it has to work much harder to stay cool. Try moving it away from heat sources if possible. Also, make sure the fridge is sitting level on the floor. A tilted refrigerator can affect how it runs. You can adjust the small legs at the bottom to keep it steady, which is helpful in older homes near Downtown Norman or Campus Corner. 3. Refrigerant Leak Problems Refrigerant is what helps your fridge pull heat out and keep food cold. If there is a leak, the refrigerator won’t cool the way it should. These leaks often come from tiny cracks or rust in coils or tubing inside the unit. Signs of a refrigerant problem include: The fridge not getting cold enough   Strange hissing or bubbling sounds   The compressor running nonstop Refrigerants are dangerous to handle, so this is not a DIY fix. If you notice these signs in homes, it’s best to call a trained refrigerator repair technician in Norman Oklahoma. 4. Compressor Issues The compressor is the heart of your refrigerator. It moves refrigerant through the system so cooling can happen. In most fridges, it’s found at the back near the bottom. If the freezer fan is running but the fridge is still warm, the compressor or its start relay could be failing. This is a serious repair and should never be handled without proper training. A faulty compressor can cause more damage if ignored. 5. Dirty Condenser Coils Condenser coils help release heat from the refrigerator. Over time, they collect dust and dirt, especially in busy households. When coils are dirty, air can’t flow well, and the fridge struggles to stay cold. These coils are usually located underneath or behind the refrigerator. Before cleaning: Unplug the fridge Remove the bottom grill if needed Use a coil brush to loosen dust Vacuum the area carefully Cleaning coils every 6 to 12 months helps keep the fridge running smoothly. 6. Broken Condenser Fan The condenser fan helps cool the compressor and coils. It should run whenever the compressor is on. If the fan stops working, heat builds up and cooling performance drops. The fan is usually located near the bottom of the fridge. If debris blocks the blades, clear it away. If the fan still doesn’t spin, the motor may need to be replaced. For safe installation, homeowners across South Norman often rely on experienced appliance repair technicians. 7. Worn or Damaged Door Gaskets Door gaskets are the soft rubber seals around the fridge and freezer doors. When they crack or lose shape, cold air leaks out and warm air gets in. You’ll find gaskets along the edges of the doors. Some models allow easy replacement, while others require professional help. To replace a gasket: Unplug the refrigerator Remove the old seal carefully Clean

Dryer Smells Burning Tips for Norman, OK Homes
Appliance Tips & Service

Dryer Smells Burning Tips for Norman, OK Homes

Dryer Smells Burning? Useful Tips for Norman, OK Homes Dryers work hard every time you use them. They push out hot air, collect lint, and rely on moving parts to dry your clothes safely. When lint builds up, airflow gets blocked, or parts start to wear out, heat can rise quickly. That’s often when the burning smell shows up. If you’ve ever smelled something burning from your laundry room, that sudden worry you feel is completely understandable. A burning smell is one of those warning signs your home gives you. It’s telling you that something isn’t right. Here is the complete guide on how to identify burning smell and how to fix it immediately.  What Causes a Burning Smell in the dryer? If your dryer gives off a burning smell, it’s important to figure out what’s causing it as soon as possible. The steps below will help you identify what’s causing the smell and decide whether it’s something you can handle yourself or a sign that it’s time to call a professional dryer repair expert. 1. Lint Buildup Do you see lint inside your dryer or around it? If yes, this is a serious fire risk. The good news is that lint buildup is also one of the easiest problems to fix. Start by unplugging the dryer. Use a vacuum with a hose attachment to remove as much lint as you can. Be gentle when cleaning near the motor and heating element. Take time to clean the inside walls of the dryer housing and the floor underneath the unit as well. This is also a smart time to disconnect the vent hose. Shake out any lint and debris trapped inside. Once everything is clean, put the dryer back together and run an empty cycle. Stay nearby while testing to see if the burning smell is gone. 2. Failing Thermostat If lint doesn’t seem to be the issue, the problem may be a failing thermostat. The thermostat controls the dryer’s temperature. When it stops working properly, the dryer can overheat, which may cause a burning smell. With the dryer unplugged, use your owner’s manual to find the thermostat. Carefully remove it and test it using an ohmmeter. If the reading is anything other than zero, the thermostat is not working correctly and should be replaced. 3. Bad Drive Belt Every dryer uses a rubber drive belt to spin the drum. Over time, this belt can wear out or slip out of place. When that happens, friction or contact with the heating tube especially in gas dryers can cause the belt to melt and create a burning smell. Check inside the dryer for a long rubber belt wrapped around the drum. It should fit snugly but not too tight. Look closely for signs of cracking, melting, dryness, or wear. If the belt looks damaged, it needs replacement. Bringing the old belt to the store can help ensure you buy the correct one. You can also ask a local appliance repair professional to find and install the right part for you. 4. Damaged Dryer Motor As dryers age, the motor can begin to fail. A worn-out motor may overheat and produce a burning smell. This issue is often paired with loud or unusual noises during operation. Dryer motor replacement is not a DIY task. For safety and proper repair, this work should always be handled by a qualified service professional. How to Fix a Burning Smell from a Dryer in the Long Run If you notice this smell, your first step should be simple and immediate. Turn off the dryer, unplug it, and remove the clothes from the drum. This quick action helps lower the risk of fire and protects both your appliance and your laundry. The best way to stop a burning smell from coming back is to keep your dryer clean and give it regular attention. Dryers don’t need much maintenance, but the few steps they do require can make a big difference in safety and performance. Below are simple, effective ways to care for your dryer and help prevent burning smells in the future. 1. Clean the lint screen after every load The lint screen collects most of the fluff that comes off your clothes. When it fills up, lint can move into places it shouldn’t, like inside the dryer or the vent. That buildup restricts airflow and increases heat. A quick clean after every load helps your dryer run better, dry clothes faster, and stay much safer. It only takes a few seconds, but it prevents bigger problems later. 2. Clean the vent and duct at least once a year The lint screen collects most of the fluff that comes off your clothes. When it fills up, lint can move into places it shouldn’t, like inside the dryer or the vent. That buildup restricts airflow and increases heat. A quick clean after every load helps your dryer run better, dry clothes faster, and stay much safer. It only takes a few seconds, but it prevents bigger problems later. 3. Inspect the exhaust vent outside Every so often, check the vent on the outside of your home. Make sure the flap opens easily when the dryer is running. Nothing should be blocking it—no lint, leaves, or even birds trying to nest. If the vent can’t open fully, heat and lint stay trapped inside the dryer. This is a common reason burning smells start. 4. Avoid drying flammable or heat-sensitive items Some items simply don’t belong in the dryer. Things with rubber backing, plastic parts, or oily or chemical residues can overheat or melt, creating strong burning odors. Clothes with cooking oil, paint, or cleaning products should be washed thoroughly or air-dried instead to stay safe. 5. Don’t overload the dryer Filling the dryer too full may seem convenient, but it makes the machine work much harder. When airflow is limited, heat builds up inside the drum. This extra heat puts stress on parts like the motor, belts, and rollers,

Top 14 Appliance Safety Tips for Norman Homeowners
Appliance Tips & Service

Top 14 Appliance Safety Tips for Norman Homeowners

Top 14 Appliance Safety Tips for Norman Homeowners Home appliances make everyday life easier, but when used improperly, they can quickly become a safety risk.  Many homeowners in Norman worry about fires, electric shocks, or sudden appliance failures when an appliance keeps blowing fuses or tripping the circuit breaker. That’s often a warning sign of a deeper problem and should never be ignored. In moments like these, people feel unsure whether to keep using the appliance, try a quick fix, or call a professional.  Here are five simple and expert-approved appliance safety tips trusted by appliance repair professionals to help you stay safe. Keep reading to learn simple safety habits that can protect your home and give you peace of mind before a minor issue becomes a major problem. Appliance Safety Tips 1. Make Sure Appliances in Damp Areas Are Plugged into a GFCI Outlet Areas like your laundry room, bathroom, kitchen, garage, or even outdoor spaces are prone to moisture. And as you probably know, electricity and water are a dangerous combination. To protect yourself, always plug appliances in damp locations into ground-fault circuit interrupter (GFCI) outlets. These outlets automatically cut off power if they detect an imbalance, helping prevent electrocution. If your home doesn’t already have GFCI outlets in these spots, upgrading them should be a top priority. Also, pay attention to appliance manuals, some appliances are not meant for outdoor or damp use. 2. Use Extension Cords Only as a Temporary Solution Extension cords might seem convenient, but they come with several risks: Loose connections can spark and start a fire. Power fluctuations can damage sensitive appliances. Water exposure increases the risk of electrocution. Overheating wires can lead to fires, especially if the cord isn’t rated for high-power appliances. If you must use an extension cord temporarily, choose one with the right gauge for your appliance. A lower gauge number means the wire is thicker. For example, a lamp might use a 16-gauge cord, while a window air conditioner requires a heavy-duty 12-gauge cord. Length matters too. Longer cords experience voltage drop along their length, a phenomenon called voltage drop. For power-hungry tools or appliances, stick to shorter, heavy-duty cords whenever possible. 3. Always Read the Operating Manual for Any Appliance You Buy It might be tempting to skip the manual when setting up a new dishwasher, washing machine, or microwave. But taking a few minutes to read it can save you time, money, and even prevent accidents. Here’s why: Check your home’s wiring – Some appliances may require dedicated circuits to avoid overloading your existing setup. Learn hidden features – Modern appliances often have advanced settings you might not discover on your own. Safety first – Manuals will tell you if an appliance is safe for outdoor use or damp locations. Avoid frustration – Operating a new appliance without guidance can lead to mistakes, wasted energy, or even damage. 4. Unplug Small Appliances When Not in Use Even if leaving a small appliance plugged in isn’t immediately dangerous, it can quietly drain energy. Many appliances, such as coffee makers, TVs, chargers, and routers, consume power in standby mode due to clocks, LEDs, or background functions. Unplugging them when not in use helps: Cut unnecessary energy consumption Lower your electricity bills Reduce wear on the appliance Just remember that some devices, like DVRs, may need to stay plugged in to maintain automatic updates. For more practical advice on using appliances safely or to schedule a professional repair, contact PrimeFix Co Appliance Repair Company in Norman. Our team will help you maintain your appliances, spot any safety hazards, and keep your home running smoothly. 5. Keep an eye on what’s cooking Unattended cooking is the major cause of kitchen fires in the U.S. and Canada. Even a few minutes away from the stove can create serious risks. If you need to step away, ask someone to watch your cooking. Staying alert is the easiest way to prevent accidents. 6. Turn the pot and pan handles inward Small hands and curious pets can get into trouble easily. Turning handles inward keeps pots and pans out of reach, reducing the risk of burns and hot spills. 7. Keep a fire extinguisher or baking soda nearby Accidents happen. Keep a fire extinguisher within reach for emergencies. For stove or oven fires, baking soda can also smother flames. Remember: Keep the oven door closed to stop an oven or broiler fire. For grease or oil fires on the cooktop, cover them with a pan lid; never pour water. 8. Buy replacement parts from reputable sources Whether it’s a refrigerator water filter or a cordless vacuum battery, always buy from trusted suppliers. Using counterfeit or low-quality parts can compromise safety and appliance performance. 9. Keep your oven and range clean Grease and food residue can catch fire if left unchecked. Regularly clean your oven, burners, and range to reduce the risk of fires and keep your kitchen safe. 10. Use the correct microwave cooking times Microwave fires are rare, but overheating food can be dangerous. Always follow the recommended cooking or reheating times. Never put metal dishes or other metal items in the microwave; they can spark and start a fire. 11. Secure your portable appliance cords Loose or dangling cords are more than just a nuisance; they’re a tripping hazard and can lead to injuries. Whether you’re using or storing your appliances, make sure cords are neatly tucked away. 12. Keep portable appliances away from the sink Hair dryers, blenders, or other small appliances should never be used near water. Even a small splash can cause a serious electric shock, so always give your sink some space. 13. Clean your dryer lint trap A clean lint trap isn’t just about better drying; it’s a key fire prevention step. Clean it after every load, and follow the manufacturer’s instructions for cleaning the exterior vent system. Don’t forget to remove lint from behind the dryer and around the drum as needed. 14. Use

What is the Average Appliance Repair Costs in Norman, OK
Appliance Tips & Service

What is the Average Appliance Repair Cost in Norman, OK

What is the Average Appliance Repair Cost in Norman, OK When an appliance suddenly stops working, the first question most homeowners in Norman ask is, “How much is this going to cost me?”  Unexpected appliance breakdowns can disturb your routine and stretch your budget. From a washing machine that won’t spin to a refrigerator that stops cooling, these issues often arrive unannounced. In this routine, you should know the average cost of appliance repair in Norman. It can help you plan, avoid overpaying, and decide the best course of action. Many homeowners worry about rising repair costs, potential damage from attempting DIY fixes, or not knowing which service provider to trust.  This guide is designed to give you clear, practical information so you can make the right decisions without stress, save money, and keep your appliances running smoothly. Factors That Affect Appliance Repair Costs in Norman Appliance repair costs vary from home to home. Several key factors determine how much you may pay for a repair in Norman. Understanding these essential factors helps you know what to expect before calling a technician. 1. Type of Appliance Appliance repair costs vary from home to home. Several key factors determine how much you may pay for a repair in Norman. Understanding these essential factors helps you know what to expect before calling a technician. 2. Age and Condition of the Appliance Older appliances may cost more to repair. Parts can be harder to find, and wear and tear add up over time. If an appliance is not well-maintained, even a small issue can turn into a larger repair. 3. Severity and Complexity of the Problem Simple issues, like a loose connection or clogged filter, usually cost less to fix. More serious problems, such as motor failure or control board issues, take longer to repair and require specialized tools and skills. 4. Brand and Parts Availability Some brands use unique or hard-to-find parts. When parts are not easily available, repair costs can increase due to higher prices or longer wait times. Common brands often offer more affordable, readily available parts. 5. Labor Rates in Norman Local labor rates also affect the final cost. In Norman, repair pricing can vary based on experience, service quality, and response time. Skilled technicians may charge more, but they often complete repairs faster and more reliably. Average Appliance Repair Costs in Norman in 2025 Buying a new appliance can be costly. In many cases, a repair is the more practical option. It helps restore normal use without the stress of a full replacement. Below is a breakdown of common household appliances and the average repair costs you may expect in 2025. 1. Refrigerator Repairs Refrigerator repairs often cost more than other appliance fixes, but they are still far less expensive than replacing the unit. Since your fridge runs all day, small problems can grow over time if ignored. A common issue is an ice maker that stops working. This may occur due to a seized motor module, a clogged inlet valve, or a failed mold heater. Another frequent problem is a refrigerator that does not stay cold. Sometimes the fix is simple, such as adjusting the temperature setting. In other cases, the condenser may be dirty or starting to fail. If the refrigerator does not work at all, the control board could be the problem. Refrigerator repair may cost around $100 to $600, including parts and labor.  2. Oven, Stove, and Range Repairs A working oven or stove is essential for safe cooking. When burners stop working or the oven fails to heat properly, cooking becomes difficult and unsafe. Bad controls, broken wiring, or faulty igniters often cause these problems. The exact issue depends on whether the appliance runs on gas or electricity. Oven and range repairs usually cost less than refrigerator repairs. Most homeowners can expect oven repair prices between $100 and $300. Stove repair cost in Norman can be range from $75 – $100.  3. Dishwasher Repairs A dishwasher saves time and effort, especially after a long day. When it breaks down, dishes pile up quickly. Drainage problems are common and may be caused by food clogs or a failing pump. Leaks can also happen over time. If the dishwasher stops mid-cycle or won’t start, mechanical issues may be the cause. Dishwasher repair costs are similar to range repairs. Most repairs fall between $150 and $300. 4. Washing Machine Repairs If your washing machine shows error codes or stops during a cycle, the issue could be simple. An unbalanced load is often the cause. However, problems with the main electronic control board can also occur. Most washing machine repairs cost between $120 and $300. Newer models with advanced features may cost more to fix due to added technology. 5. Dryer Repairs Dryers can fail in several ways. Common issues include no heat, a broken timer, or a machine that will not turn on. These problems are often linked to failed heating elements, faulty wiring, or damaged controls. Average dryer repair costs range from $100 to $450. In some cases, this can be close to the price of a new dryer, depending on the model and repair needed. Tips to Reduce Appliance Repair Costs Appliance repairs can be expensive, but a few smart habits can help keep costs under control. These simple steps can also help your appliances last longer and work better. Stay on Top of Regular Maintenance Regular maintenance makes a big difference. Cleaning filters, checking hoses, and keeping vents clear can prevent minor issues from becoming costly repairs. A little care now often saves a lot of money later. Use Certified Parts When a part needs replacement, certified parts matter; they are made to fit your appliance properly and usually last longer. Using the right parts can reduce repeat repairs and protect the appliance from further damage. Schedule Repairs Early If something feels off, do not wait. Strange noises, leaks, or error codes often mean a small issue is starting. Fixing the problem

Appliance Repair Tips & Tricks For Norman Homeowners
Appliance Tips & Service

Appliance Repair Tips & Tricks For Norman Homeowners

Appliance Repair Tips & Tricks For Norman Homeowners Get Expert Tips and Guidance Proper appliance maintenance is important for every homeowner in Norman. But the fear of causing more damage and the uncertainty of where to start often keep them from trying simple DIY fixes. These worries are completely normal. But the truth is, most everyday appliance issues are small, preventable, and easy to manage when you know what steps to take. That’s why we’ve created this practical, to-the-point guide. It focuses only on the essential tips that help you avoid sudden breakdowns, cut unnecessary expenses, and keep your appliances working longer.  With just a little routine care, you can extend appliance life by 40–50% and prevent up to 85% of common failures without stress or guesswork. Why Appliance Maintenance Matters Home appliances are a major investment. In many households, the total value can easily reach $15,000–$25,000, so taking care of them is not optional; it’s essential.  When appliances are ignored or used without routine checks, small issues turn into bigger ones. You may see energy bills rise by 20–30%, the lifespan of the appliance drop, and repair costs climb to 50–60% of the price of a full replacement. In some cases, worn parts can pose safety risks, which makes delays even more costly. Regular maintenance protects you from all of this. It keeps your appliances running smoothly, prevents hidden problems from spreading, and helps each machine work at its best. Simple care can save you money, reduce stress, and make your home safer without requiring professional help every time. Common Appliances Needing Service in Norman Most homes rely on several large appliances every single day, so it’s completely normal for them to run into issues from time to time. Some problems are simple and easy to fix, while others need a closer look. Below are the most common appliance issues Norman homeowners face. Leaky Washing Machine A leaky washing machine can interrupt your whole day. No one wants to see water pooling on the floor, especially when it stops you from doing laundry. In most cases, these leaks occur due to worn seals, loose valves, damaged hoses, or minor blockages within the machine. Any of these issues can allow water to escape and create a mess. If you spot water on the floor, the solution might be simple. Sometimes cleaning or replacing the hose or seal fixes the problem quickly. These parts are easy to find at local home improvement stores, and many homeowners can replace them without stress. Noisy Dishwasher A noisy dishwasher can be just as frustrating. Since dishwashers are used often, parts like the motor, pump, or filtration system can wear down over time. When that happens, you may hear grinding, rattling, or squeaking noises. These sounds are early warning signs, so it’s always smart to pay attention before the issue gets worse. In many cases, tightening a loose part or cleaning the filter is enough to solve the problem. This helps clear any clogs and allows the pump to work smoothly again. However, if the motor has failed, it’s usually a bigger repair and often considered the worst-case scenario. Refrigerator Making Noise and Not Cooling Few situations cause instant stress like realizing your refrigerator is making noise and isn’t cooling. When that happens, you suddenly have to worry about fresh produce, dairy, and other foods going bad. Common causes of cooling issues include low refrigerant levels, dirty condenser coils, a faulty thermostat, or a struggling fan motor. The first step is to figure out what’s causing the problem. You can clean the coils yourself or check whether the thermostat or the fan is working. But refrigerators are more complex than they look, and many key parts are difficult to reach. That’s why diagnosing and repairing them often requires professional help. DIY Tips for Simple Appliance Maintenance and Repairs Taking care of your home appliances doesn’t have to be complicated. A few small habits can help your machines run smoothly, save energy, and last longer. Below are simple maintenance tips you can follow, along with signs that it might be time to call a professional. 1. Refrigerator Maintenance: Keeping Your Food Fresh and Energy Bills Low Your refrigerator works all day, every day. A little monthly care can keep it efficient and prevent sudden breakdowns. Monthly Tasks Clean condenser coils: Dust and debris collect behind or under the fridge. Dirty coils force the compressor to work harder and can increase energy use by almost 25%. A quick brush or vacuum makes a big difference. Check door seals: Look at the rubber gaskets for cracks or tears. To test the seal, close the door on a dollar bill. If it slides out easily, the seal may need to be replaced. Monitor temperatures: Keep your fridge at 37°F (3°C) and your freezer at 0°F (-18°C) to maintain food safety and efficiency. Quarterly Tasks Deep clean shelves and drawers Replace the water filter (if your fridge has one) Check the ice maker and clean the ice bin Signs You Need Professional Help The temperature won’t stay steady Heavy frost is building up Strange noises or vibrations Water pooling inside or underneath 2. Dishwasher Care: Ensuring Spotless Dishes and Odor-Free Operation A well-maintained dishwasher cleans better and prevents unwanted smells. Weekly Tasks Inspect and clean spray arms: Check for food particles stuck in the holes. A toothpick or thin wire works well for clearing them. Wipe down door seals: Remove any grease or food buildup from the rubber seals. Monthly Tasks Clean the filter: Take out the cylindrical filter at the bottom and rinse it thoroughly. Run a cleaning cycle: White vinegar or a dishwasher cleaner helps remove mineral deposits and grease. Best Practices Scrape your plates, but don’t fully rinse them modern dishwashers can handle leftover food Load dishes according to the manufacturer’s layout Use rinse aid to prevent spotting Leave the door slightly open after cycles to help air-dry and reduce mold 3. Washing Machine Maintenance: Preventing

How to Fix a Leaking Washing Machine Get Expert Tips
Appliance Repair

How to Fix a Leaking Washing Machine in Norman OK

How to Fix a Leaking Washing Machine: A Simple Guide for Norman Homeowners Get Expert Tips and Guidance A leaking washing machine is stressful because it can leak quickly and create a big mess. You may notice water on the floor, a small drip, or a slow leakage that causes hidden damage over time. It may feel like a big headache when clothes don’t wash properly. Many people in Norman deal with the same problem, and it can be hard to know whether the leak is a simple fix or something that requires a washing machine repair technician. A washer can leak for many reasons. You might overload the machine, and a fill hose may be damaged. These small issues can turn into bigger problems if you don’t catch them early. That’s why we shared this guide with you to help you learn how to troubleshoot a leaking washing machine step by step and how to fix it on your own. Keep reading this article to get complete guidance. 12 Common Causes of a Washing Machine Leaking Many homeowners don’t realize that even a tiny hole, crack, or loose part in the system can lead to a much bigger problem. Below are the most common types of washer leaks and the steps that help you solve them quickly. 1. Clogged Overflow Tube Using too much detergent can create thick suds that push into the overflow tube, causing fluid to spill out. This happens a lot in HE washers when non-HE soap is used. To check your detergent level, do a simple test: Place a freshly washed item in clean water. If the liquid turns soapy, you’re using too much. Just reduce the amount of detergent. This small change often stops the leak without any cost. 2. Overloaded Washer When the washer is packed too full, the drum moves unevenly. This out-of-balance action can cause water to pass past seals and create leakage around the door or base. The fix is easy. Wash smaller loads and follow your machine’s load guidelines. Overloading doesn’t only cause leaks, it also stresses the system and creates more wear and heat. 3. Unlevel Washing Machine If your washer isn’t level, it shakes during the spin cycle. This movement can loosen parts and allow water to escape. Unplug the machine first. Then adjust the leveling feet until the washer sits flat. Use a light carpenter’s level to check both directions. Floors shift over time, so check the level every few months. 4. Disconnected or Loose Drain Hose If you see water coming from the back during the drain cycle, the drain hose may be loose or not fully seated. Look behind the washer. Make sure the hose is firmly attached to the machine and the standpipe. Tighten the clamp if needed. If you notice a crack, stiffness, or corrosion, replace the hose to prevent further fluid loss. 5. Clogged Drain Pipe Sometimes the washer works fine, but the home’s drainpipe is blocked. Lint or debris slows the flow, causing water to back up and look like a washer leak. Try clearing the pipe with a drain cleaner or small auger. If the block keeps coming back, you may need a professional who can use more powerful testing tools to fully clear the system. 6. Disconnected or Damaged Fill Hose If you see water during the fill cycle or even when the washer is off, check the hot and cold fill hoses. Over time, rubber hoses can loosen, weaken, or burst due to pressure, heat, or simple wear. Inspect both hoses from the faucet to the washer. Tighten them at both ends. If you notice bulging, cracks, or corrosion, replace the hoses. Stainless-steel braided hoses resist pressure better and last longer. 7. Worn Rubber Washers Each fill hose has small rubber washers that help keep water inside the system. When these washers wear out, fluid can drip down the back of the machine, causing a slow leak. Even a tiny crack in a washer can lead to a gradual loss of water. Turn off the pressure supply first. Remove the hoses and replace the rubber washers inside the fittings. Then reconnect the hoses and turn the water back on. Check for any leaks using a quick test. If you can’t tell which washer is bad, replace both. It’s simple and prevents future damage. 8. Water Pump Leak The water pump helps to move dirty liquid out of the washer tub. If the pump is worn, cracked, or the clamp becomes loose, water can escape from the bottom and create a clear leak. If you notice fluid dripping from the pump area, the pump likely needs to be replaced. Some handy homeowners can replace the pump themselves, but the part sits deep in the system, and a small mistake can cause more damage. That’s why professional help is often the safest choice. 9. Tub Defect Your washer uses two tubs. The inner tub has holes, and the outer tub holds the water. If the outer tub gets a crack or defect, leakage can happen during filling or washing. This issue is more serious because the tub is part of the main system. A tub defect is not a DIY job. Reaching it requires taking apart several systems inside the washer. Contact a trained repair technician to inspect the damage and replace the broken part safely. 10. Malfunctioning Water Level Switch If the water level switch stops working, the washer may take in too much water. Too much pressure inside the tub can cause leaks from the drawer, the door, or even the bottom of the machine. The washer may also pull in excess air, which can affect the system. This part controls how much liquid enters the washer, so it must be handled with care. A professional can run proper testing, remove the faulty switch, and install a new one without harming other parts. 11. Broken Door Gasket Seal (Front-Load Washers) Front-load washers use a large rubber

Common Dishwasher Problems and How to Fix Them
Appliance Repair

Common Dishwasher Problems and How to Fix Them

Common Dishwasher Issues In Norman and How to Fix Them Get Expert Tips and Guidance If your dishwasher has started acting up, you’re not alone. Many homeowners in Norman, OK, feel stressed when their dishwasher stops working. You rely on your dishwasher to save time and make life easier. But when it stops working, it can feel overwhelming, especially when you’re unsure whether the problem is minor or something that requires a dishwasher repair specialist. Some issues can be solved with simple at-home steps, while others may require replacement parts and a trained technician. The guide below will help you understand the most common dishwasher problems and what you can safely do to fix them. What Are the Most Basic Problems With Dishwashers? Dishwashers can run into issues with power, water flow, drainage, temperature, or internal parts. Most problems fall into a few simple categories, which we cover below. Your Dishwasher Won’t Start When your dishwasher doesn’t start at all, it’s one of the clearest signs that something is wrong. You press the button, but nothing happens, no lights, no sounds, no response. This can feel stressful because it stops your whole routine. Sometimes the cause is simple, but other times it points to a deeper electrical or mechanical issue. Causes Power supply issues: Dishwasher not plugged in, tripped breaker, or faulty outlet. Door latch not closing: Dishwasher won’t start if the door isn’t fully locked. Faulty control board or thermal fuse: Internal electrical issues prevent the engine from starting. Solutions Check power: Make sure the dishwasher is plugged in and test the outlet. Reset any tripped breaker. Inspect the door latch: Clean it and make sure it closes fully. Replace if broken. Call a technician: For control board or thermal fuse problems, a professional should inspect and repair. Contact us to book same-day repair services. (405) 914-2566 The Dishwasher Isn’t Cleaning Dishes Properly Opening the dishwasher and finding dirty dishes can be frustrating, especially when you expect a full load to come out clean. This problem can happen for many reasons, from weak water flow to blocked spray arms. Most of these issues are easy to troubleshoot once you know where to look. Causes Clogged spray arms: Food debris blocks water flow. Low water temperature: Cold water prevents effective cleaning. Low-quality or insufficient detergent: Affects cleaning performance. Overloaded dishwasher: Items block water from reaching all surfaces. Solutions Clean spray arms: Remove and rinse them under warm water. Check water temperature: Ensure the water heater is set to 120°F or higher. Use the proper detergent: Follow the manufacturer’s instructions for type and amount. Avoid overloading: Leave space between dishes so water can circulate. The Dishwasher Is Leaking Water Leaking water on the floor around your dishwasher can feel alarming. Leaks can come from worn-out seals, loose connections, or even too much detergent. Identifying the source early helps prevent water damage to your floors and cabinets. Causes Worn or damaged door gasket: Allows water to escape. Excess detergent: Too much soap can create suds that overflow. Loose hose connections: Water can leak from the inlet or drain hoses. Damaged tub or pump: Cracks or faulty components lead to leaks. Solutions Inspect and replace the gasket: Check for cracks or gaps and replace if needed. Use the correct detergent amount: Avoid overfilling the soap dispenser. Tighten hose connections: Ensure hoses are secure, and clamps are in place. Call a technician: For tub or pump damage, professional repair is needed. Dishwasher Making Loud or Strange Noises If your dishwasher suddenly becomes louder than usual, it’s a sign that something inside isn’t working correctly. A noisy dishwasher can mean debris stuck in moving parts, a failing motor, or loose components. Paying attention to the type of noise helps you understand the root cause. Causes Debris in spray arms or filters: Blocks movement and creates grinding sounds. Worn-out pump or motor: Causes humming, grinding, or rattling. Loose parts or vibrations: Can be caused by uneven placement or mounting issues. Solutions Remove debris: Clean spray arms, filters, and check for broken dish pieces. Call a technician: Replace the faulty pump or motor if cleaning doesn’t fix the noise. Level the dishwasher: Adjust feet to reduce vibration and rattling. The Dishwasher Smells Bad A bad smell from the dishwasher is one of the most common homeowner frustrations. The odor usually comes from trapped food particles, dirty filters, or a buildup inside the tub. With regular cleaning, this problem is easy to manage. Causes Food trapped in the filter or spray arms: Leads to odor buildup. Dirty drain hose: Food debris collects in the hose. Mold in the tub: Standing water or leftover food creates mold. Solutions Clean filter and spray arms: Remove and wash with warm, soapy water. Flush the drain hose: Remove clogs and rinse thoroughly. Run a cleaning cycle: Use vinegar or dishwasher cleaner to eliminate mold and odors. Dishwasher Is Clogged or Won’t Drain Standing water in the bottom of your dishwasher is a clear sign of a drainage problem. This often happens due to a clogged filter, blocked hose, or a failing drain pump. Fixing drainage early helps prevent odors and more serious damage. Causes Clogged filter: Prevents water from exiting. Blocked or kinked drain hose: Stops drainage. Garbage disposal issue: Dishwasher drains through the disposal. Faulty drain pump: Prevents water from leaving the dishwasher. Solutions Clean the filter: Remove and rinse at least once a month. Check the drain hose: remove clogs and straighten any kinks. Clear garbage disposal: Run the disposal to allow the dishwasher to drain. Call a technician: Replace the drain pump if the dishwasher still won’t drain. Dishwasher Won’t Dry If your dishes come out wet, dripping, or cold, your dishwasher isn’t completing the drying cycle properly. This can happen due to weak heat, low rinse aid levels, or airflow issues. It’s a common problem with simple solutions. Causes Not using rinse aid: Drying performance is reduced. Heating element failure: Dishes stay wet and cold. Opening the

How to Fix a Refrigerator Making Loud Noise
Appliance Repair

How to Fix a Refrigerator Making a Loud Noise

How to Fix a Refrigerator Making a Loud Noise A noisy refrigerator can grab your attention fast. One day it runs quietly, and the next you hear a buzz, rattle, or hum. It makes you worry: is this a small problem, or is the fridge about to stop cooling altogether? Many homeowners feel this stress, but you don’t have to worry about food spoiling or a big repair bill. You just want to know what’s wrong and how to fix it safely and simply. This guide will show you the common reasons for a noisy fridge, how to find the cause step by step, and when to call a professional appliance repair company for help. Keep reading this article for useful tips. Most Common Reasons for a Noisy Refrigerator Here are the main causes when a fridge starts making loud or strange noises: Evaporator fan problems The evaporator fan (inside freezer) pushes cold air into the fridge compartments. If the fan motor is faulty or the fan blades hit something, such as ice buildup, you might hear buzzing, grinding, or scraping inside the freezer. If ice has formed around that fan, it can make noise until you defrost or repair the defrost system. The drain pan is out of place Some noises come from under the fridge. If the drain pan that catches condensation is not seated properly, moves, or vibrates, it can create rattling or tapping sounds. The compressor is broken or struggling The compressor is the core cooling unit. A failing compressor or a bad start relay can make loud humming, buzzing, or even clicking/knocking sounds. Often, compressor noise becomes worse when cooling is weak or inconsistent. The condenser fan or coils are dirty/blocked Dust, dirt, or debris on the condenser coils and fan makes the fridge work harder. This extra stress causes noise, humming, or buzzing. If the condenser fan motor bearings are worn or the fan is blocked, the fridge may make a wobbling or whirring sound. Water line or ice-maker / defrost system issues (in some fridges) If your fridge has a water line or an ice maker, noise may come from the water supply, the valves, or the ice dispenser mechanism. Faulty parts in these systems, such as a malfunctioning defrost timer/heater, may cause buzzing, clicking, or periodic noises. Brand-new fridge “settling in” or normal operating noises Sometimes, especially for new refrigerators, you may hear occasional popping, cracking, or gentle noises. These can be normal as plastic parts adjust to temperature, but if noise becomes loud or persistent, check other causes. Many guides note this as a possible benign reason. Temperature settings or airflow problems If the fridge is overloaded, the air vents are blocked, or the temperature setting is incorrect, the fridge may overwork and make more noise. Also, if there is poor ventilation or the fridge is placed too tightly in a corner, vibrations may be amplified. Diagnosing the Noise Source First, find the source of the noise. This makes it easier to understand the real issue.You can check: Back of fridge (lower/outer): Noise often comes from the compressor, condenser coils, or condenser fan. Inside the freezer / fridge compartment: Usually linked to the evaporator fan, ice buildup, blocked airflow, or defrost problems. Under the fridge/bottom: Noise may come from the drain pan, water line, or the fridge being uneven or unlevel. What Different Fridge Noises Usually Mean Buzzing or humming:This usually means the fan, coils, or compressor is working harder than normal. Grinding or scraping:This often happens when the fan blades hit ice or when motor parts wear out. Rattling or tapping:This comes from loose parts, a shaky drain pan, or the fridge not sitting evenly on the floor. Clicking or occasional ticking:This is usually related to the ice maker, water valve, or the defrost timer turning on and off. How To Find Fan-Related Noises in a Refrigerator If your diagnosis points toward fan problems (evaporator or condenser), try this: Unplug the fridge — always start with safety. Open the freezer or back panel (as per your model) to access the fan. Inspect the fan blades and motor — spin the blades gently by hand (if safe) to feel whether they spin smoothly or hit ice/debris. Defrost the freezer if you see frost or ice. Let it melt fully, then recheck the fan. Clean fan blades and motor area — dust, dirt, or pet hair can cause obstruction. Check mounting and grommets — loose mount or worn rubber grommets can cause vibrations or noise.   If the fan is damaged or the motor is faulty, replace the fan motor or part (if comfortable) or call a technician. Step-by-Step Guide to Fixing a Noisy Refrigerator Here’s a practical checklist — follow these steps in order. Unplug the refrigerator for safety. Pull the fridge away from the wall — give it at least 1–2 inches of clearance. This helps ventilation and reduces vibration noise. Use a level to check if the fridge stands evenly. Adjust the feet if it rocks or tilts. This simple step can stop rattling or humming caused by uneven placement. Clean condenser coils and condenser fan (if present). Use a brush or vacuum. This reduces dust build-up, which often forces the fridge to overwork and become noisy. Check the drain pan under the fridge: Make sure it’s seated properly and not loose. If loose, secure or reposition it. Inspect the water line or ice maker (if your fridge has one) — check for loose tubes, vibrations, or faulty valves. Sometimes noise comes from the water supply system rather than the cooling system. Open the freezer and check the evaporator fan. Defrost the fan if ice builds up, clean the blades, and check for damage or loose mountings. Plug the fridge back in and listen carefully — Check if the noise continues and where it comes from. If the noise continues or the fridge isn’t cooling, the issue is likely inside the fan motor, compressor, or defrost system. When to Call

Scroll to Top